Hi everyone, it's been awhile since I last posted something.
It's been quite a hectic time for the past few months especially with the ongoing pandemic we have right now. On the positive note, I wanted to share some material setups that I've been using quite often in ue4. You might have seen some of these as I have posted about them in my previous blogs but I feel like I'll do a summary of the stuff I made.
Procedural Height Based Material
One of the most commonly used material blend I made is the procedural height based mats. It blends 2 textures (or more) using their height information, a very useful way if you just want to do a quick puddle or wetness info into our material.
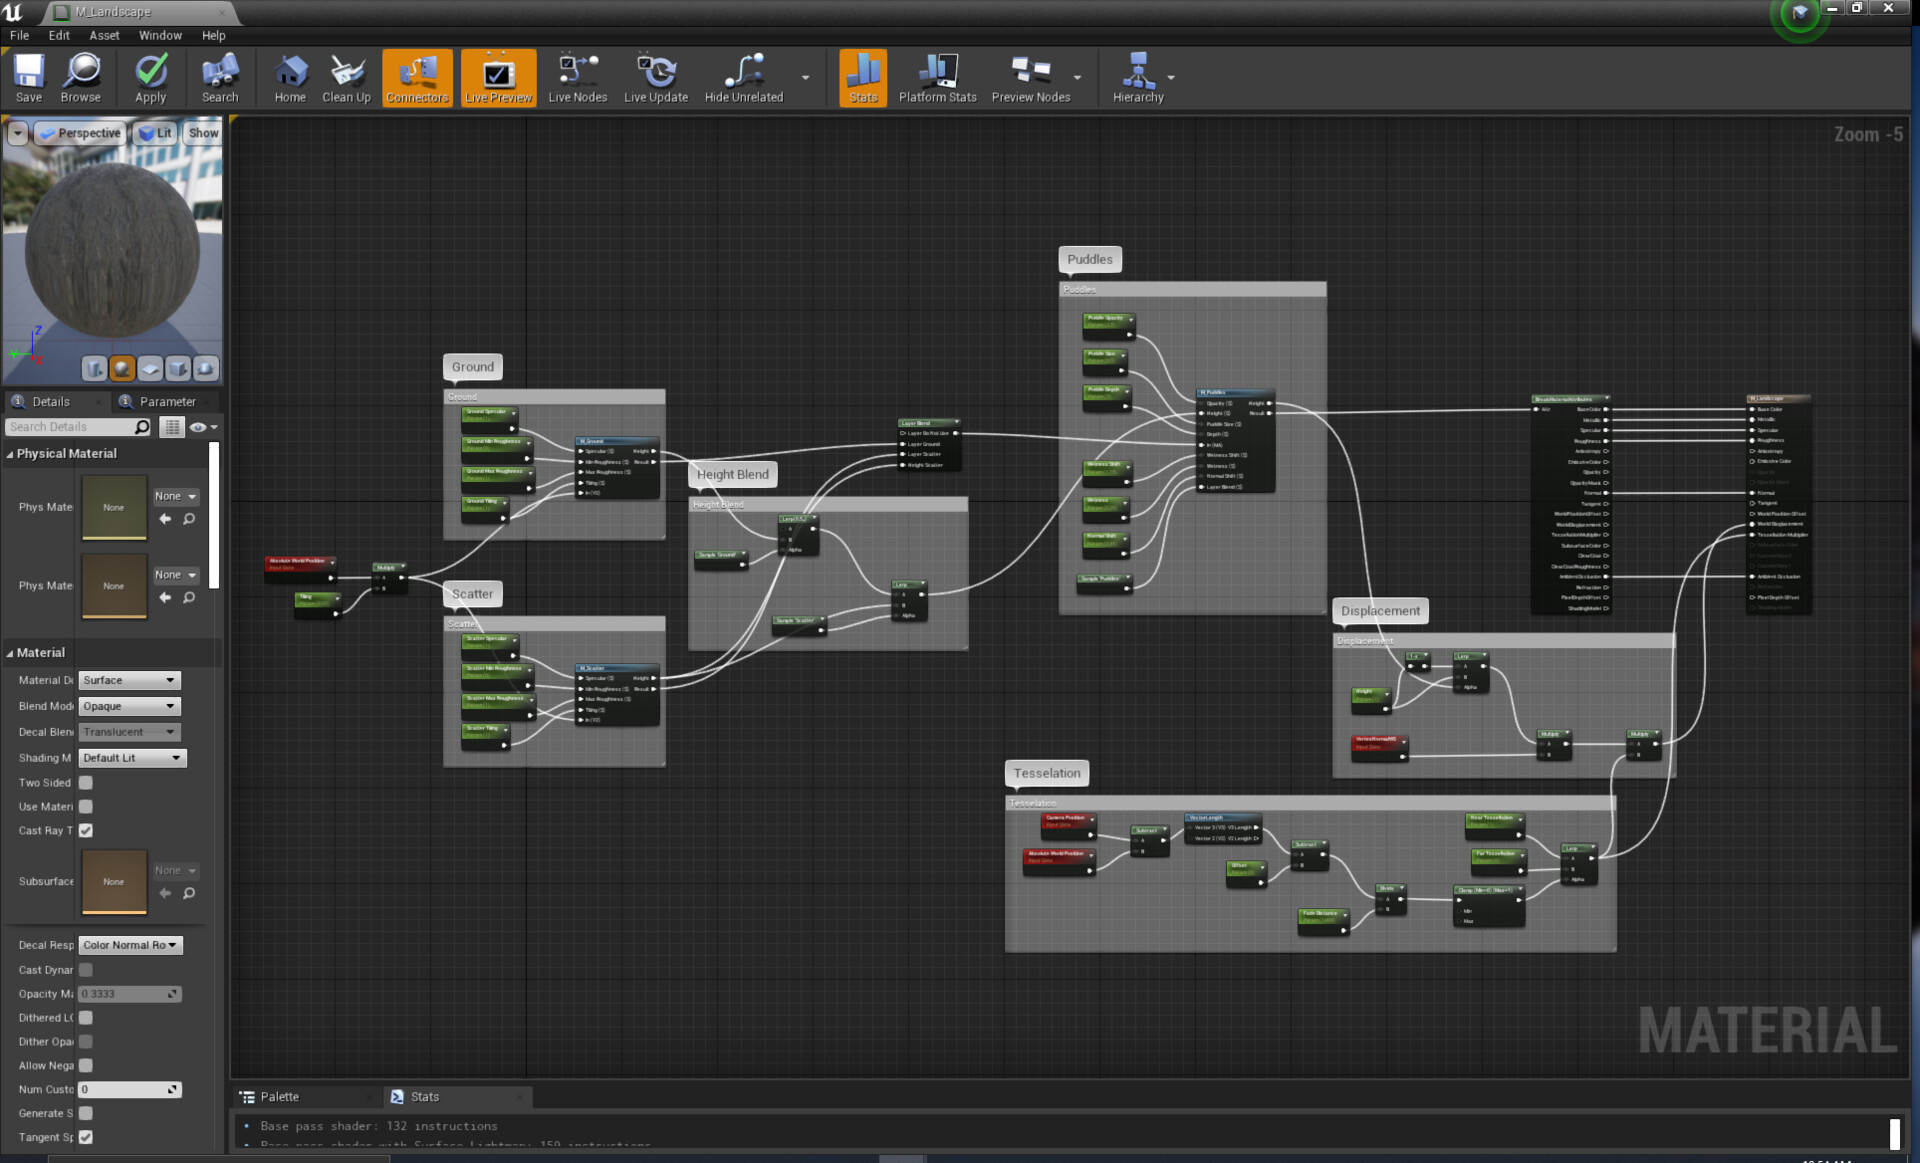

The first time I used this was during my thesis project. Where I wanted to create a more natural look into the puddles without having to paint them manually. The setup itself isn't that complicated using an if function to blend between the height value that you then expose into a parameter. Using that same function, I've also made a custom wetness function that detects the difference between each height value so it blends nicely. Here's how the material works in action:
Procedural Blend Material
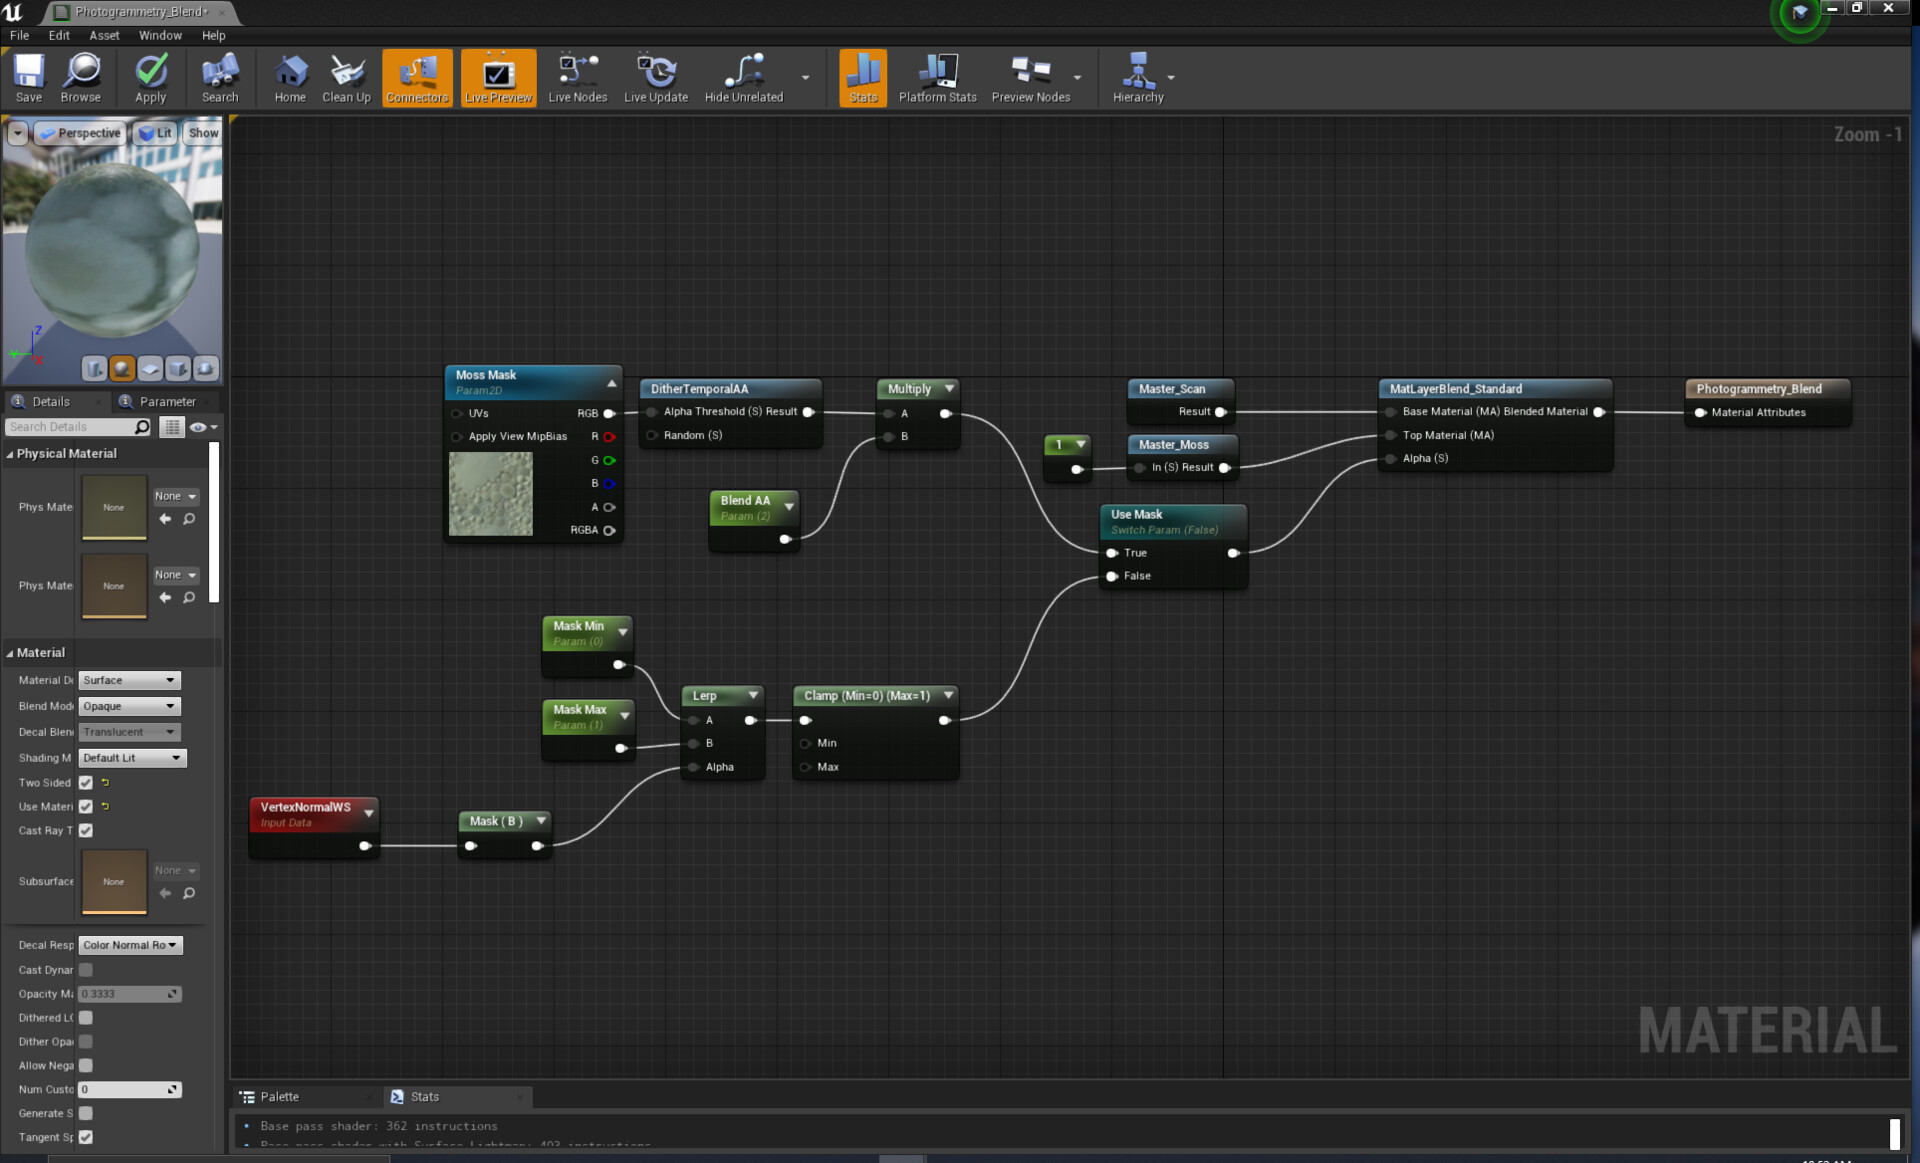
The second material I used the most is the procedural blend material. This one is much simpler, basically all I did was pulling either a normal info and/or occlusion data from the engine. This works really well with things like moss or snow as they often grow in those areas.
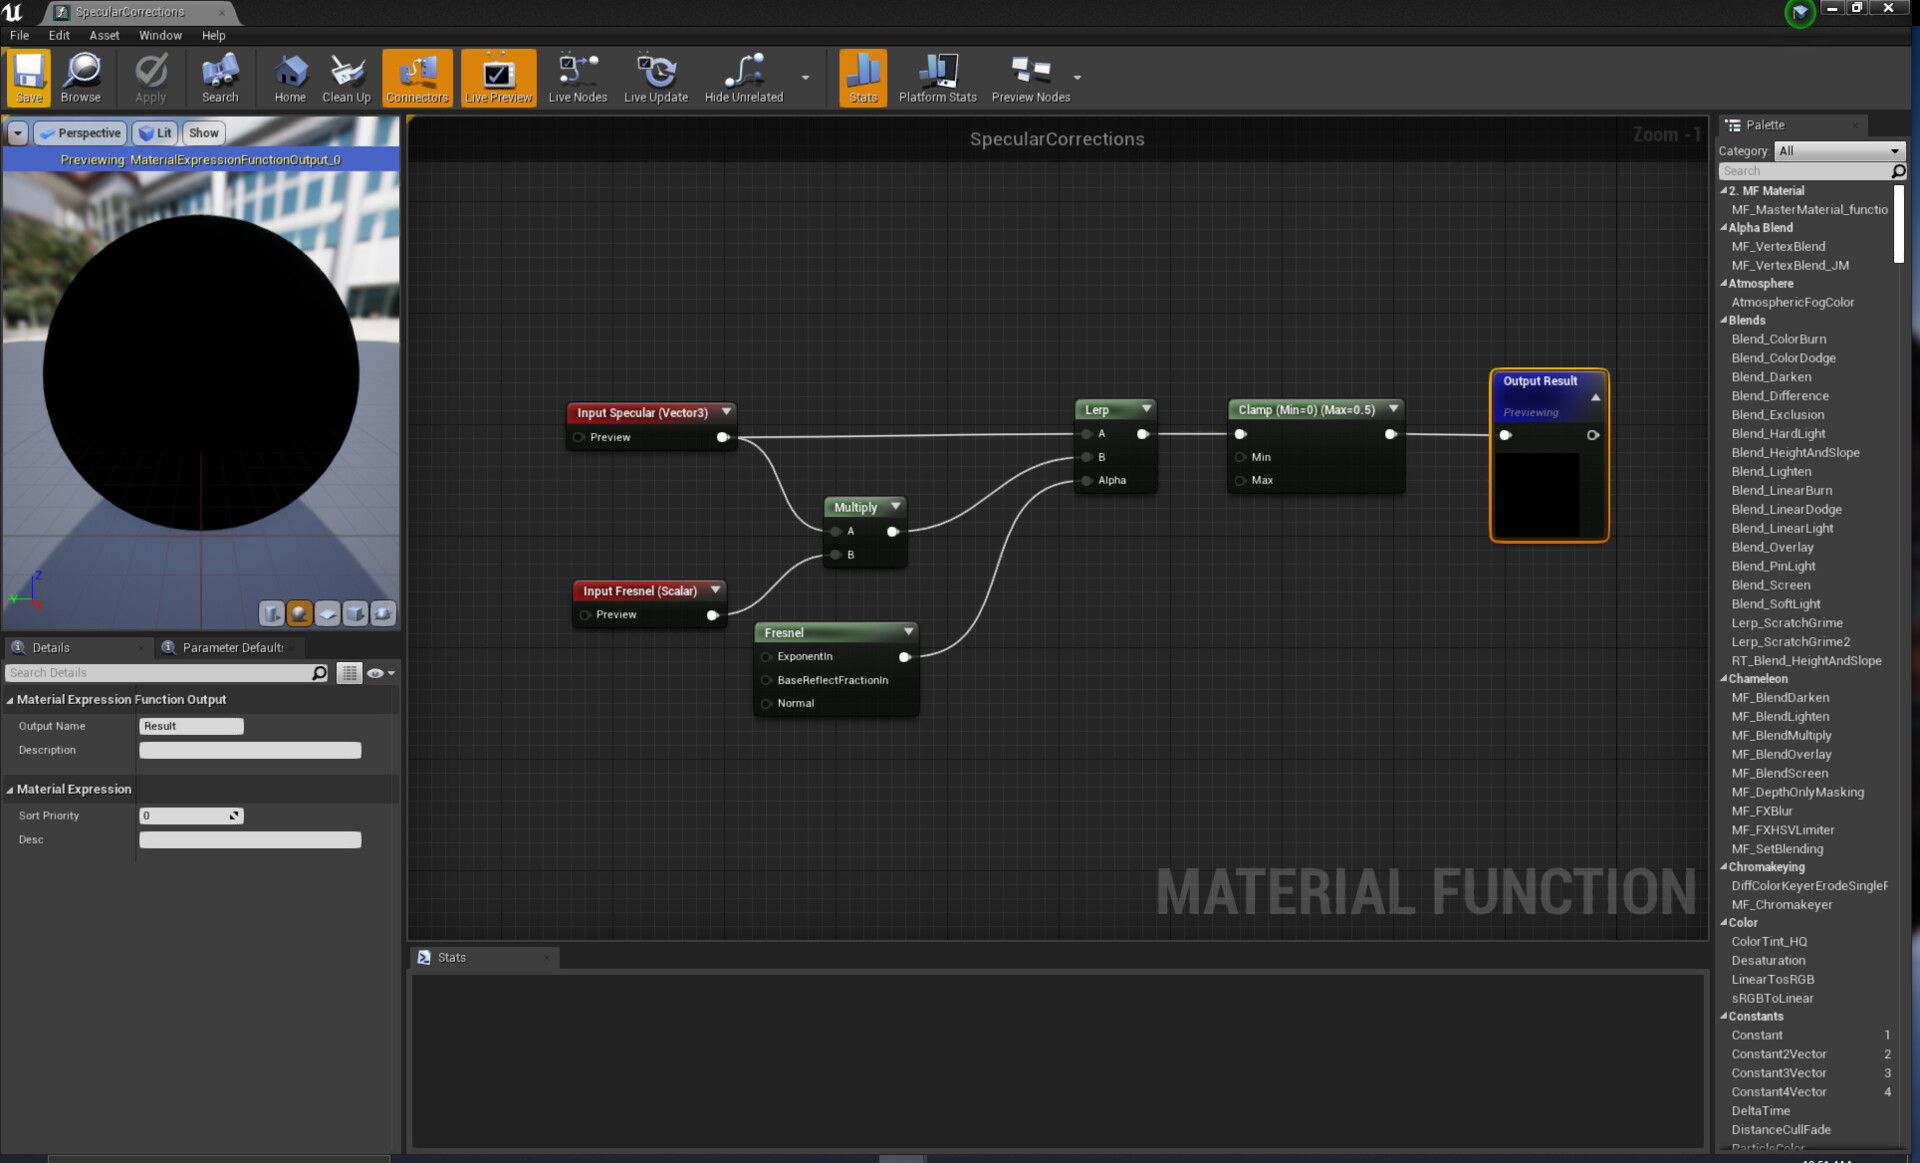
The base material function relies on 1 texture set that is our moss/snow material. I made a simple spec correction function which is basically a fresnel pass exposed with a scalar parameter. You don't really need to create a function but it's a simple way to simplify your workflow if you know it's something you'll use multiple times. I also like using fresnel as a specular IOR to mimic how it works in the traditional cg pipeline.
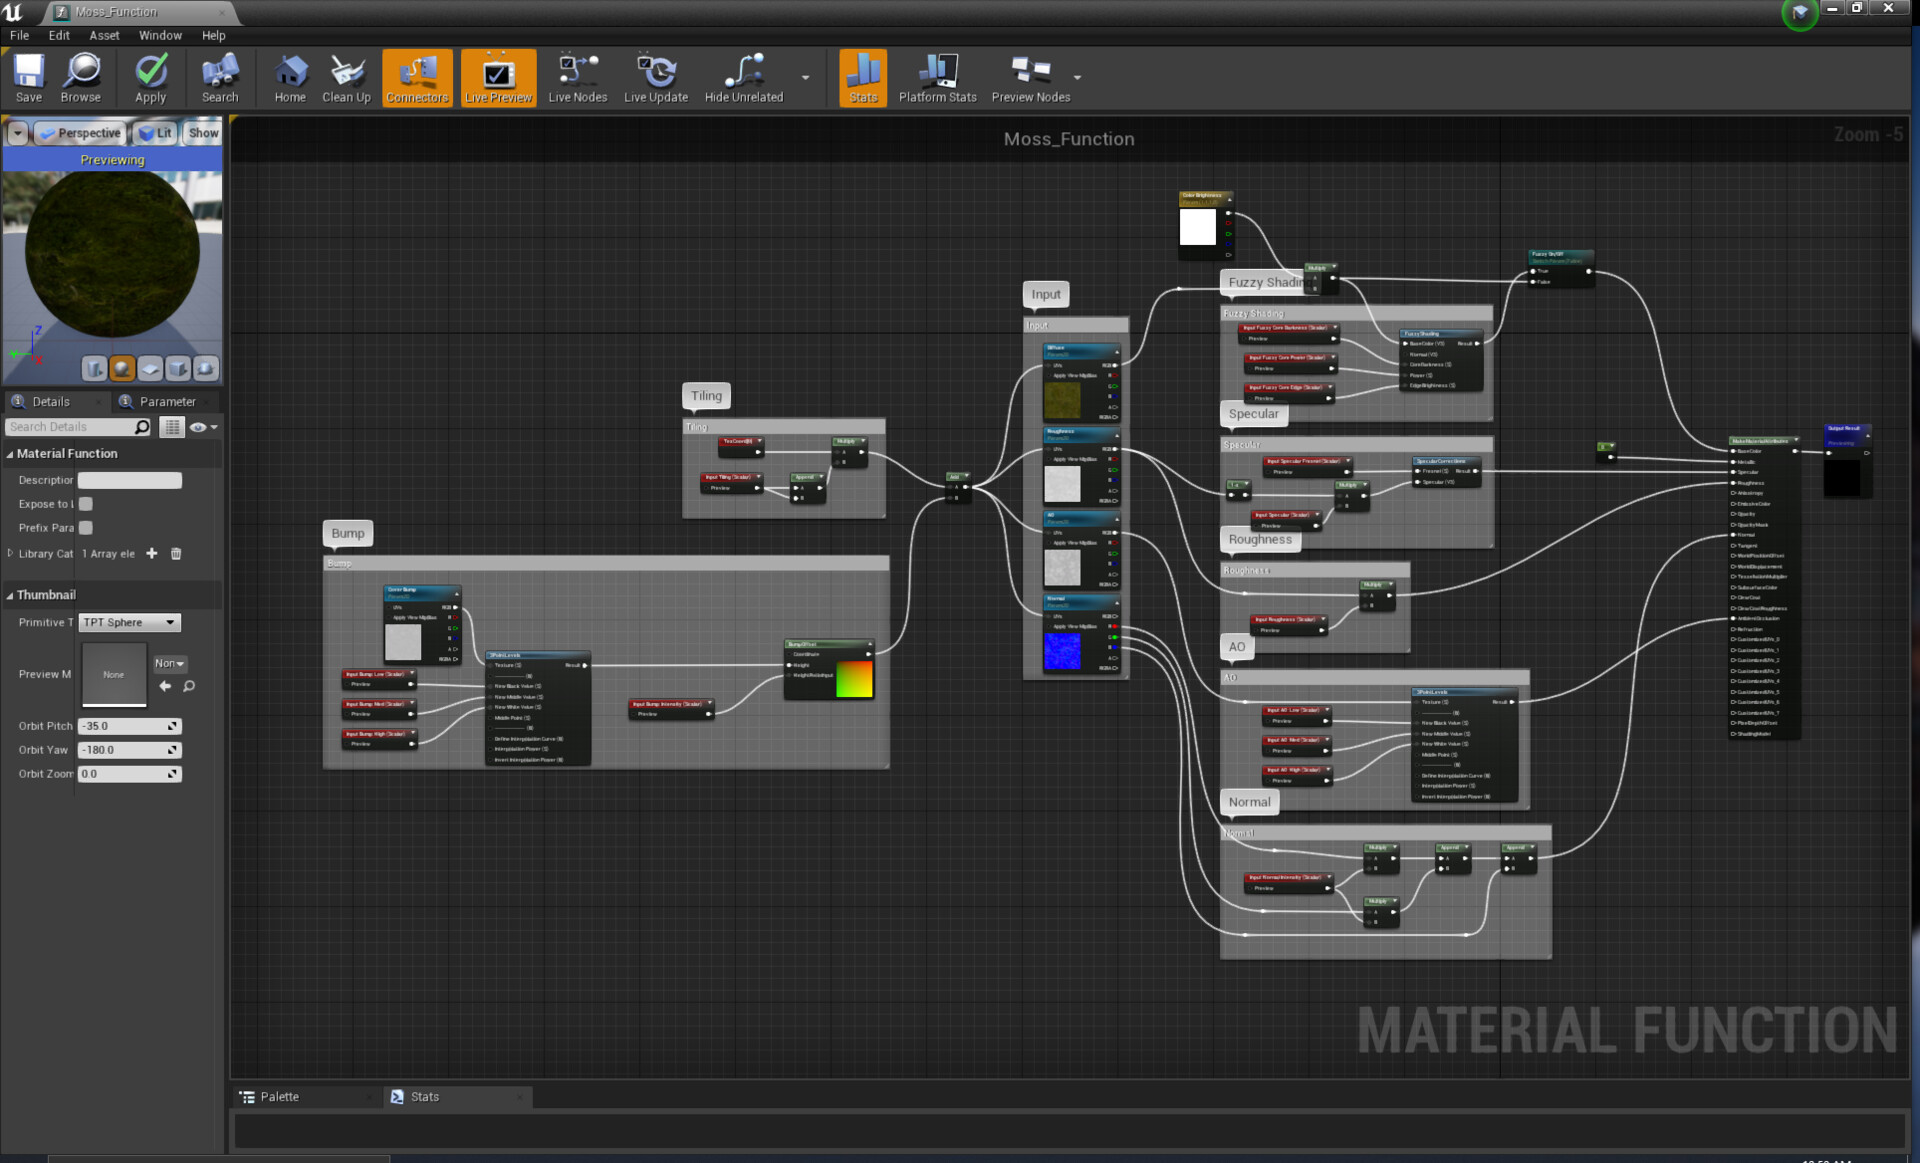
The last part is to create the material blend. You can either use a mask that you created in other software, or just use work procedurally. In this example, I used vertex normal as a base blend but you can definitely modify it using AO or Curvature instead.
Fake Volumetric
This trick is not something I used often nowadays unless it's for a non-raytraced project. Getting a nice light shaft to look nice is often hard and especially when things needs to be art directed a lot. There are a lot of volumetric card tutorials out there right now that you can look at. But I'm a lazy person and thus likes to work procedurally.The basic setup is basically all about animating 2 different noise textures that uses different scale. This was then multiplied using a depth fade to adjust the visibility of the volumetric asset.
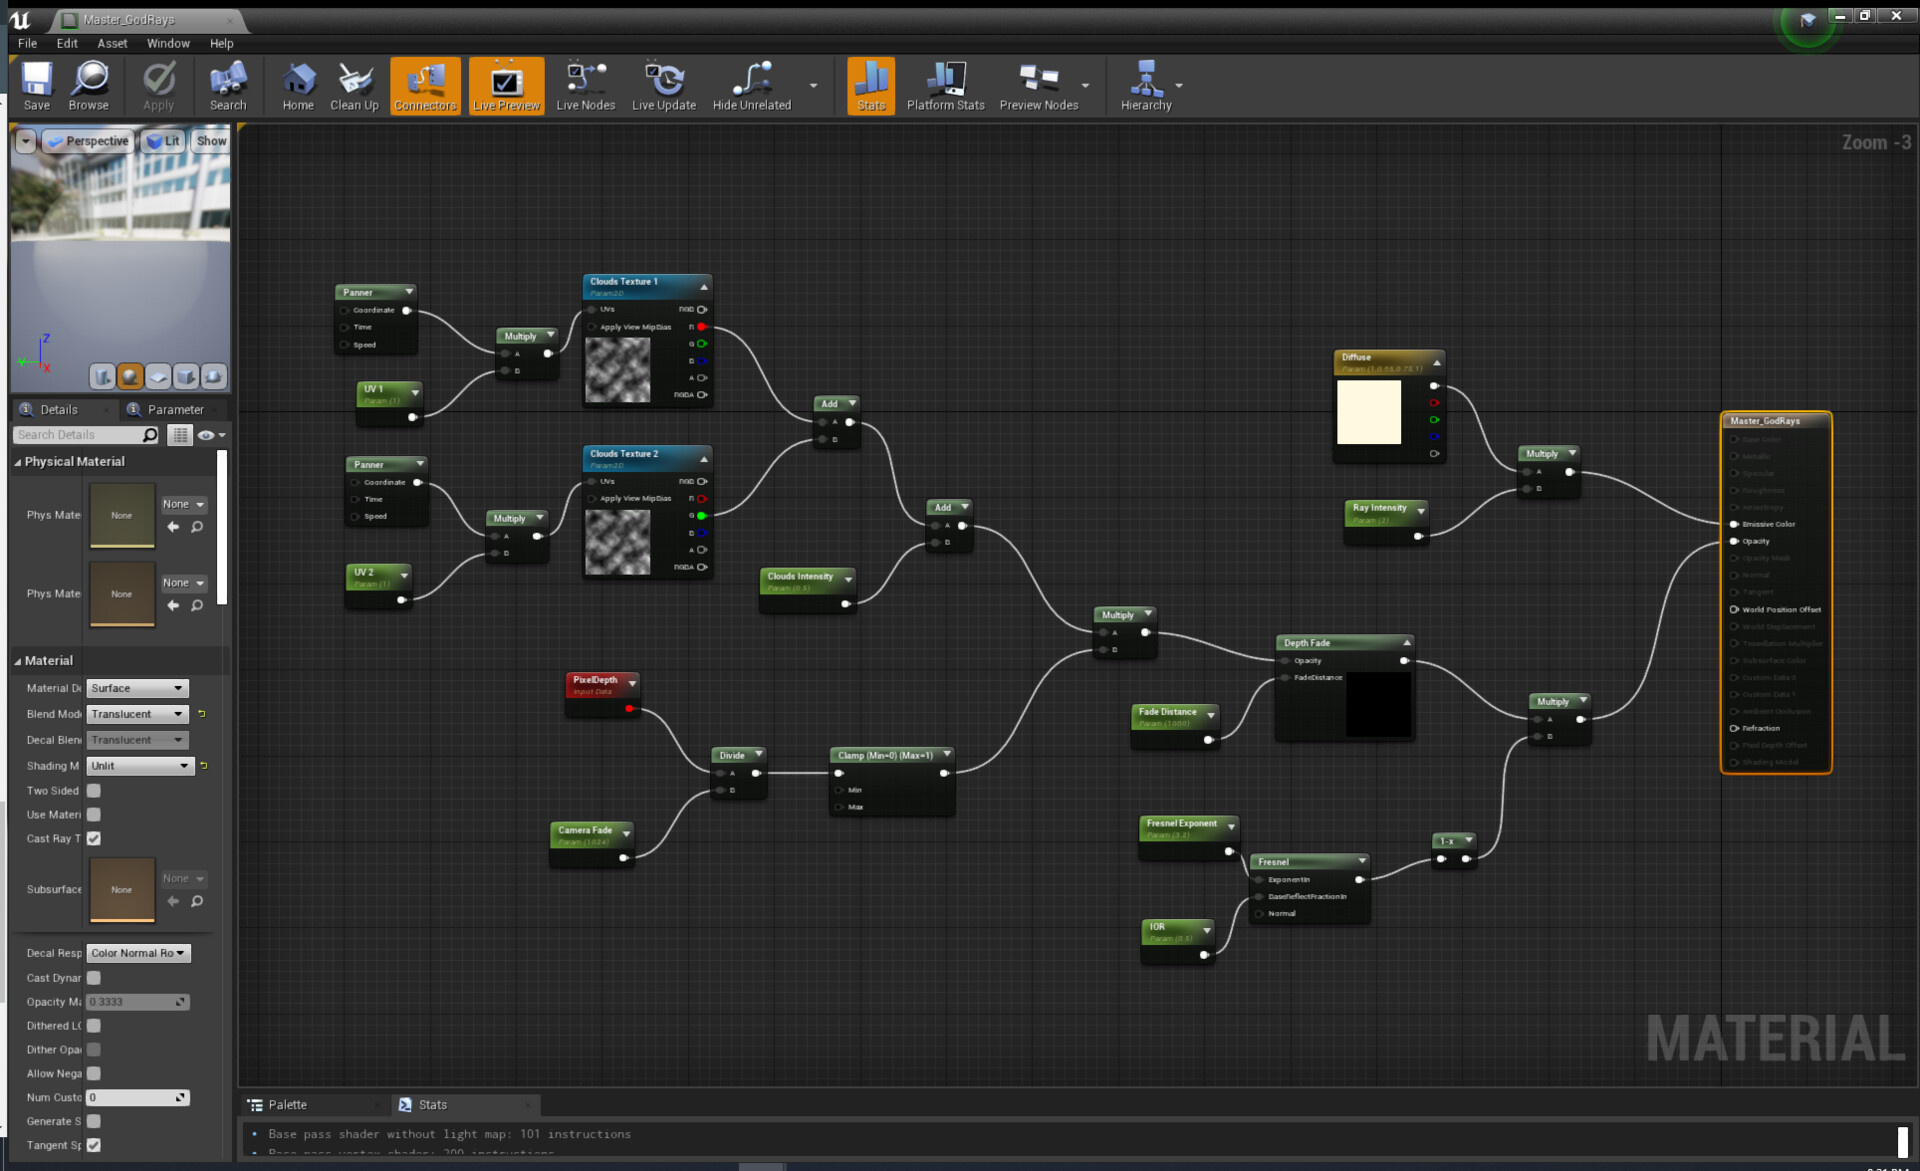
I've used this simple setup in my thesis and expanded it more for an unannounced project. It works pretty well with the real-time volumetric clouds that was introduced back in engine version 4.25 although you'd want to have raytraced translucency to be off. It's one of those things where the raytracer doesn't like any pixel/screenspace tricks.
That's it for now, I'll be posting about some of the tools I've worked on the past couple months.