Hey guys, welcome back to my thesis blog!
This week I'll be showing the updated environment that I've been polishing for the past week. I've been working on a new landscape asset, including a layered material and some background animation.
1. Creating the Cave Landscape
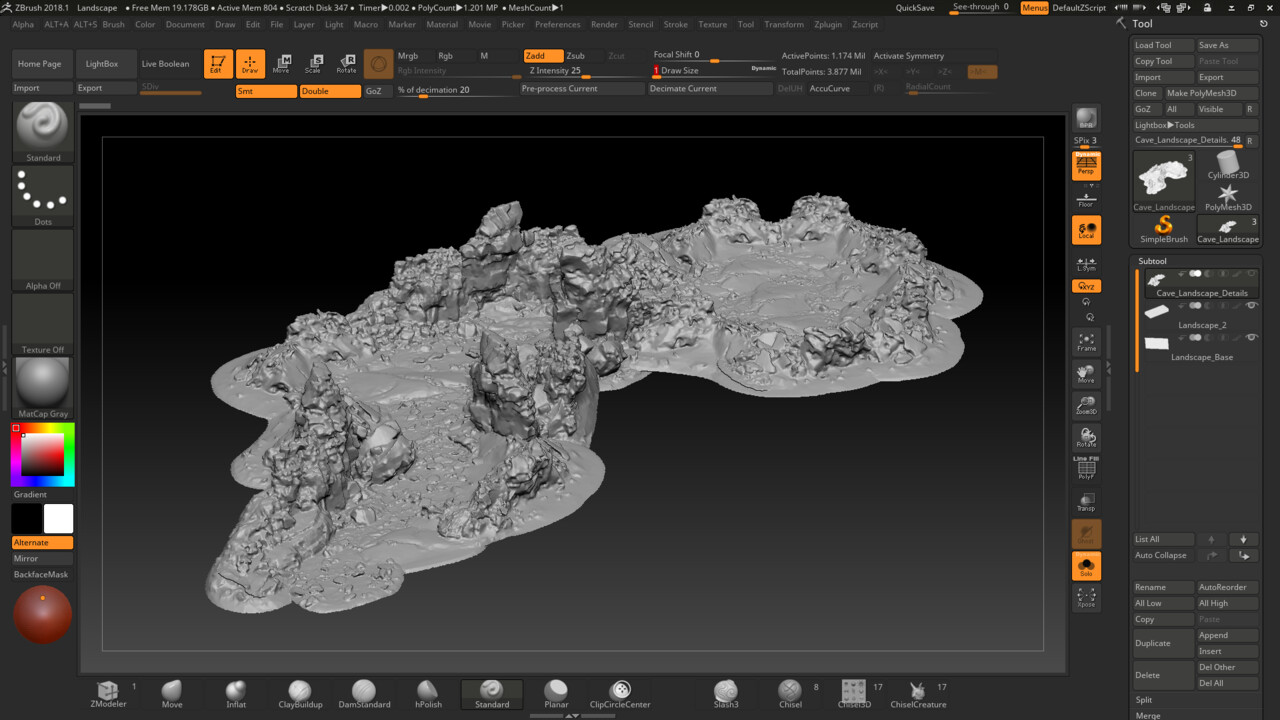
To start the creation process, I've exported a combined landscape mesh that I've created in Unreal using Quixel assets. To simplify the process, I dynameshed the entire cave assets, import the base landscape grid mesh and re-project all the details from the merged geo. This technique allows me to get a nice height information for later use in Unreal.
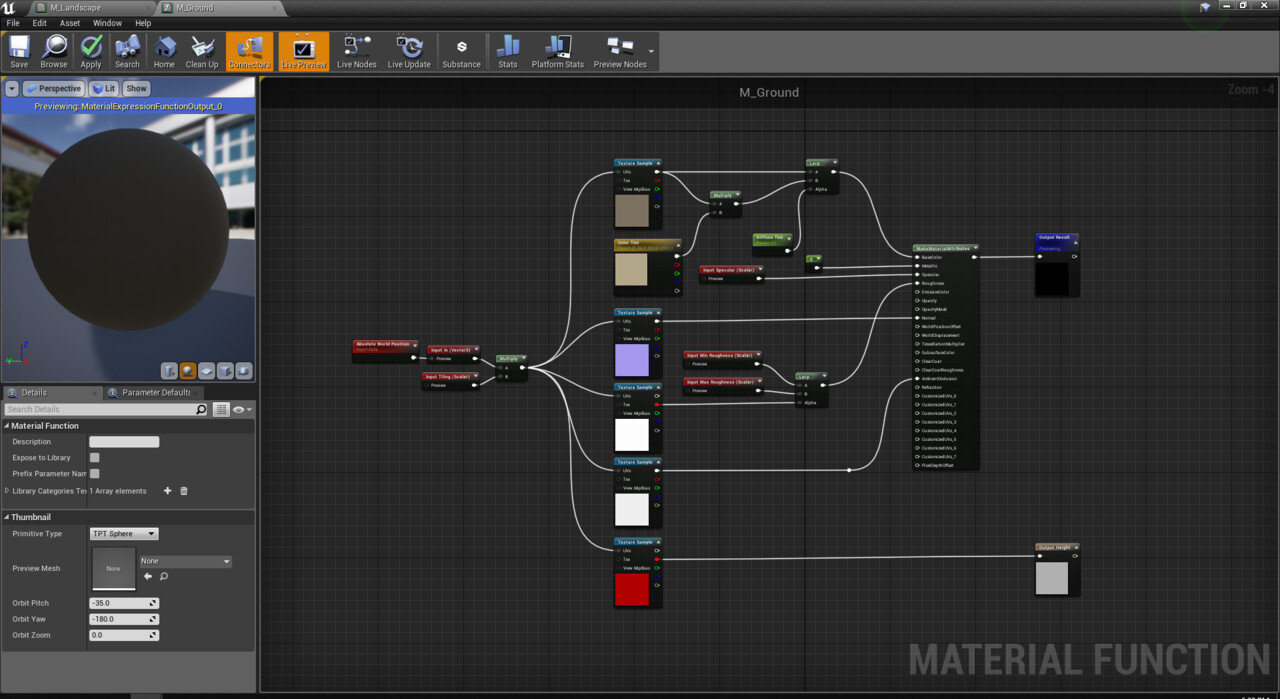
Once it's done, I exported the Displacement .exr from Zbrush to Nuke to reformat it into a 16 bit .png data that Unreal Engine can read for their Landscape Height maps. Now that we have the landscape geo imported, it's time to create the materials! To start with, I created a simple ground material function as the base layer.
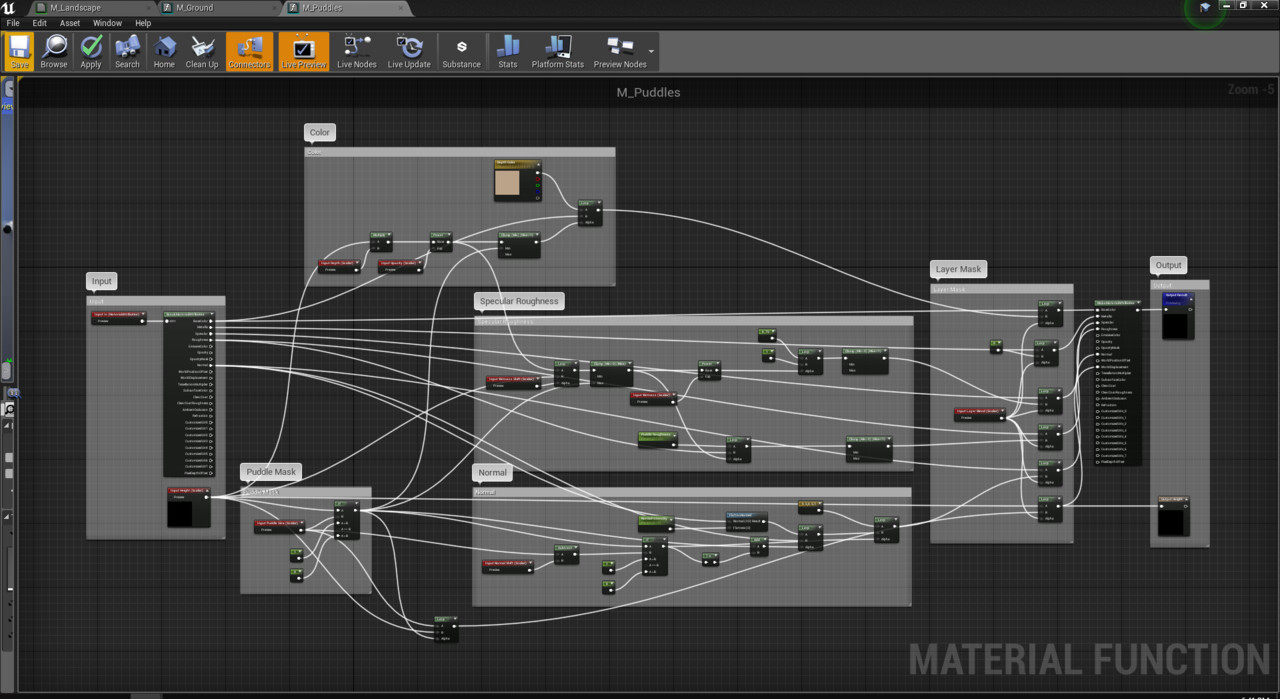
I recreated the puddle material function based on a tutorial on YouTube. Basically, it's using the previous material layer height information to drive where the puddles shows up by using the if node function. This node essentially works while comparing the 2 nodes connected (A and B). If node A > B, the node will activate the node attached to it, and vice versa.
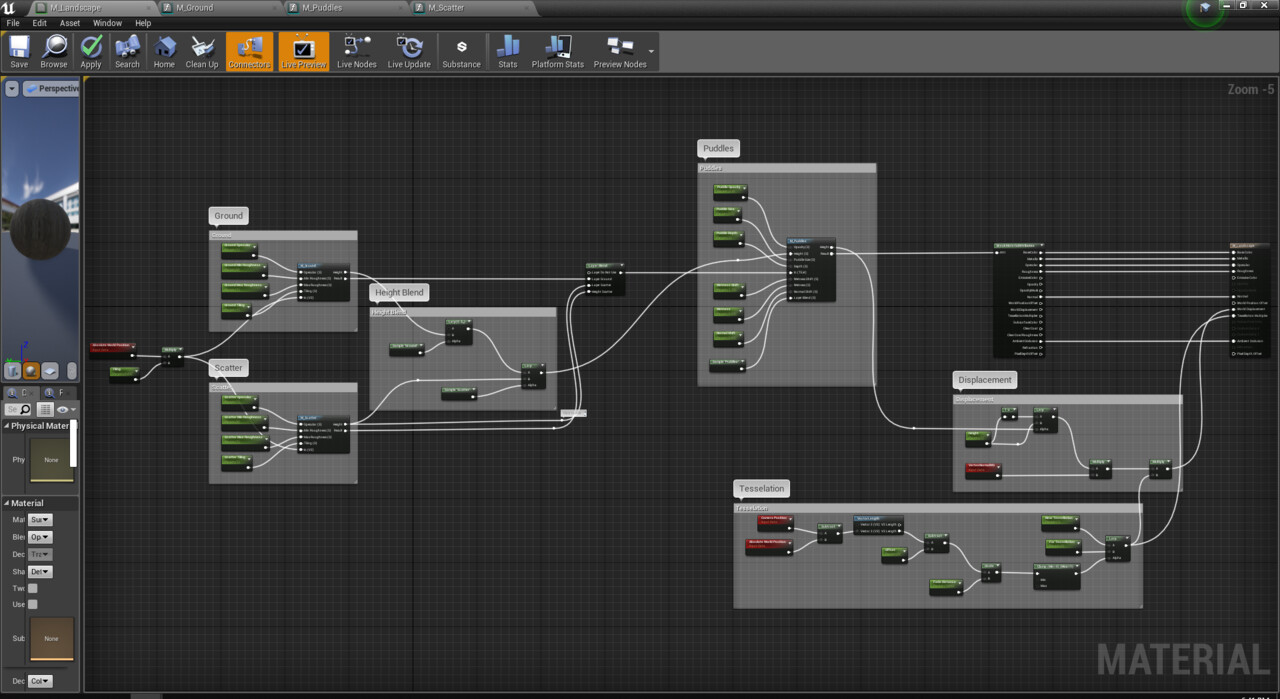
Here's the final node graph for the landscape material. Using 2 tile-able materials (in this case, ground and scattered leaves) as the main layers, with procedural puddles generated by the combined height information, displaced based on the distance to the camera. This material setup give me a good control over how the landscape looks.
2. Implementing Animation/FX into the Environment
After reading through an article by Sam Gao on the Technical and Art Tips for Environment Artists, I realized how a simple movement (if done right) can affect how we perceive something. One thing that often overlooked by artists when creating an environment art is adding a subtle background animation. Although it doesn't need to be extravagant, a dynamic vibrancy adds a lot to the overall feel of the environment. Using the example project on Particles, I've decided to add some dust, water and fire FX to my thesis project.
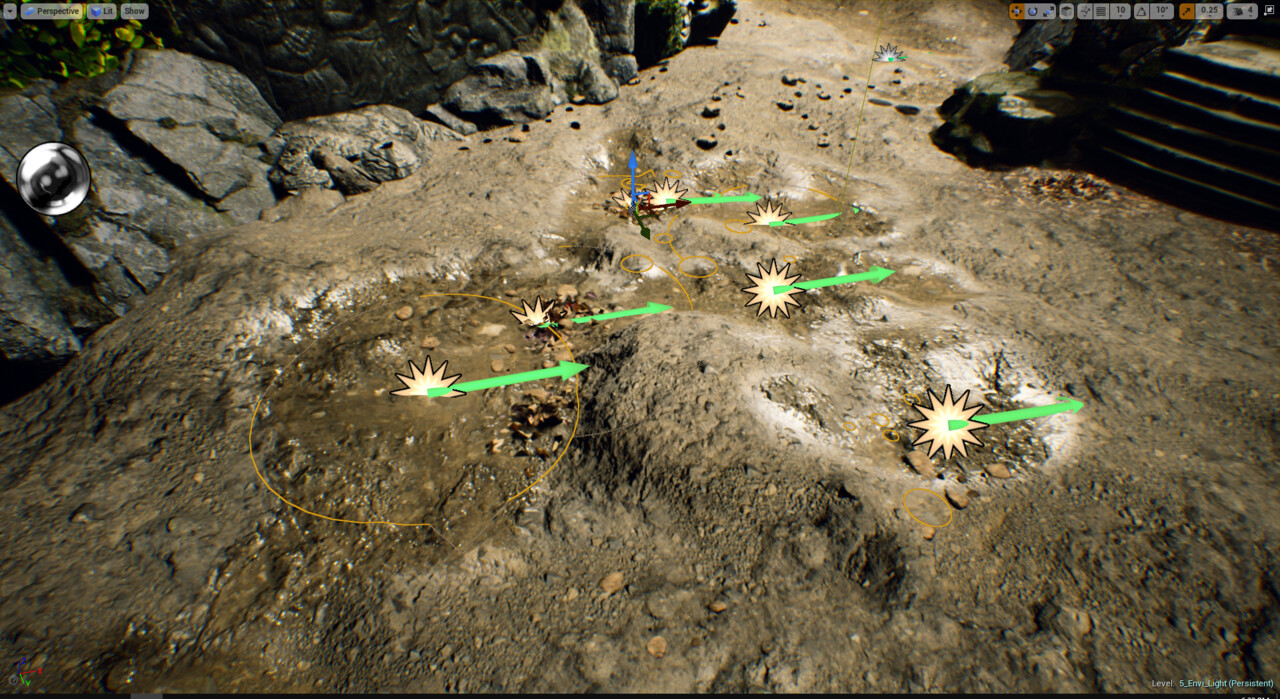
Combined with my previous landscape material setup, I can create a believable puddle scene using the example water particle system provided by Epic Games. This particle emits water splashes and drips within a certain distance.
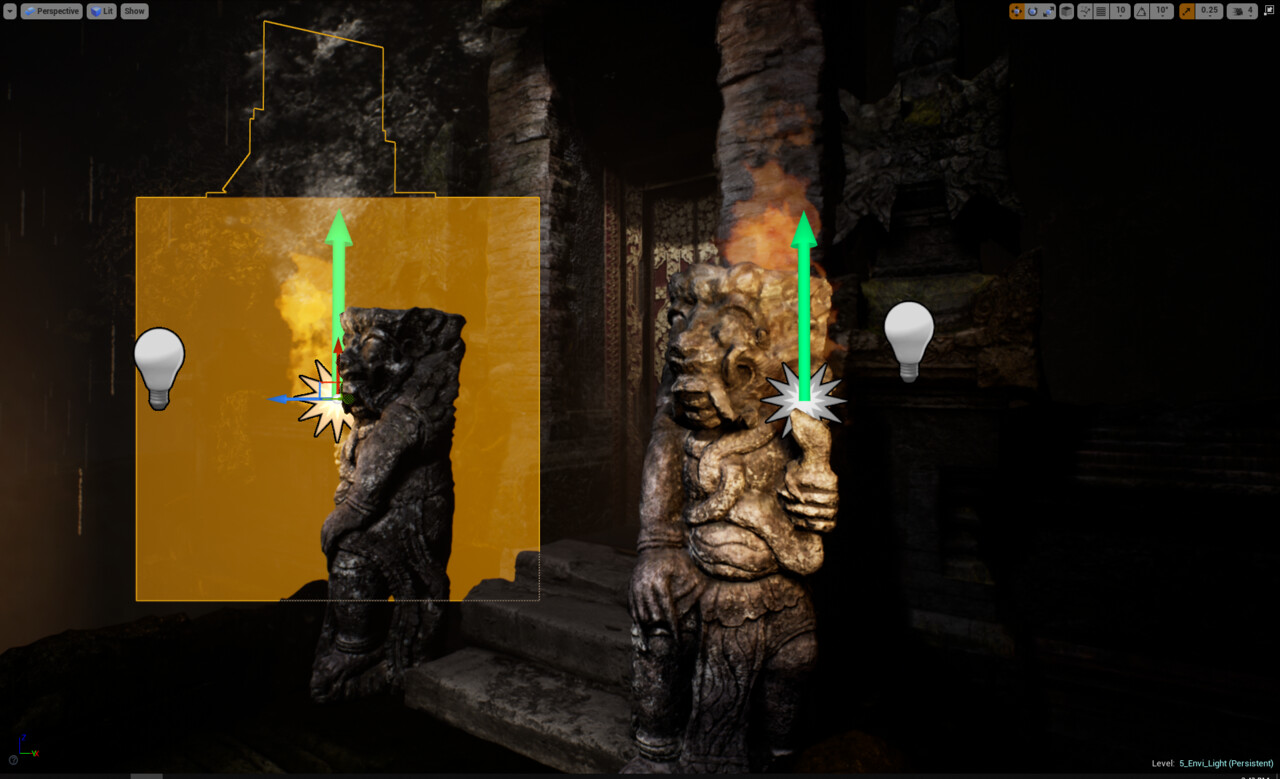
The second FX I've added was the torch fire. Using the newly imported fire FX, I can now create secondary light source which help me creates a better contrast value towards the altar scene.
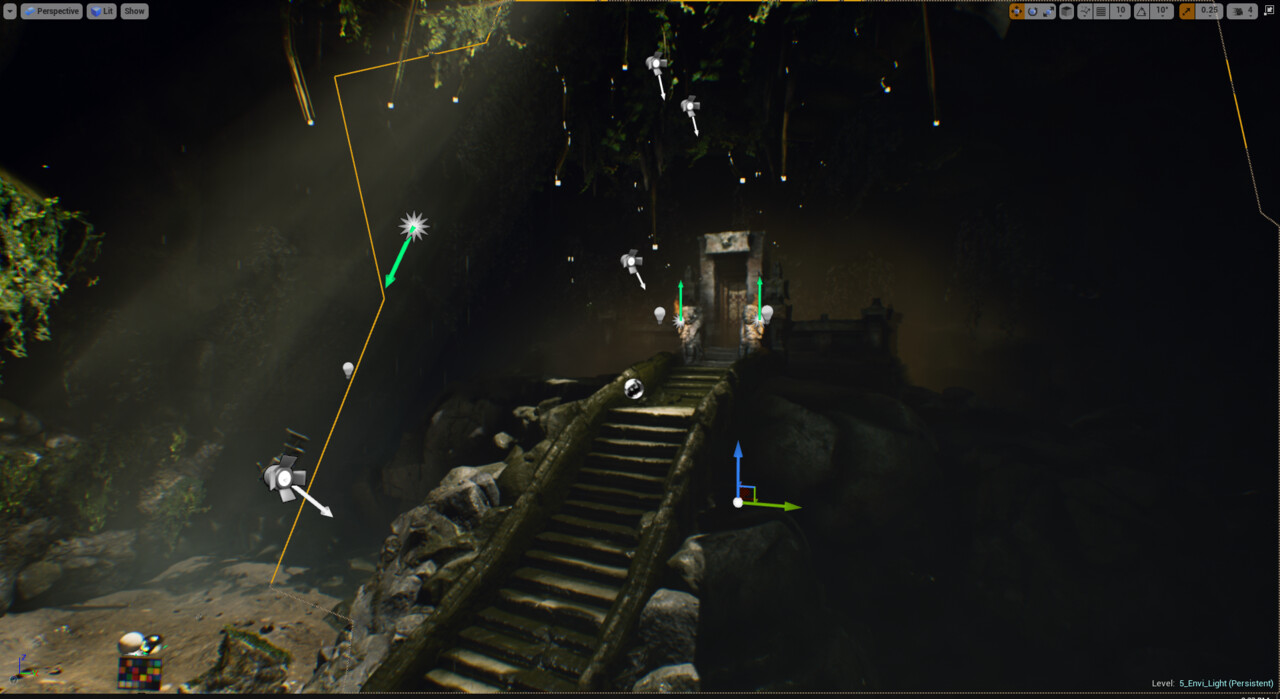
The last FX I used was the haze dust particle. This particular FX works as a controllable and scale-able height fog. It also gave a nice cold haze to the otherwise warm environment.
3. Rendering and Compositing
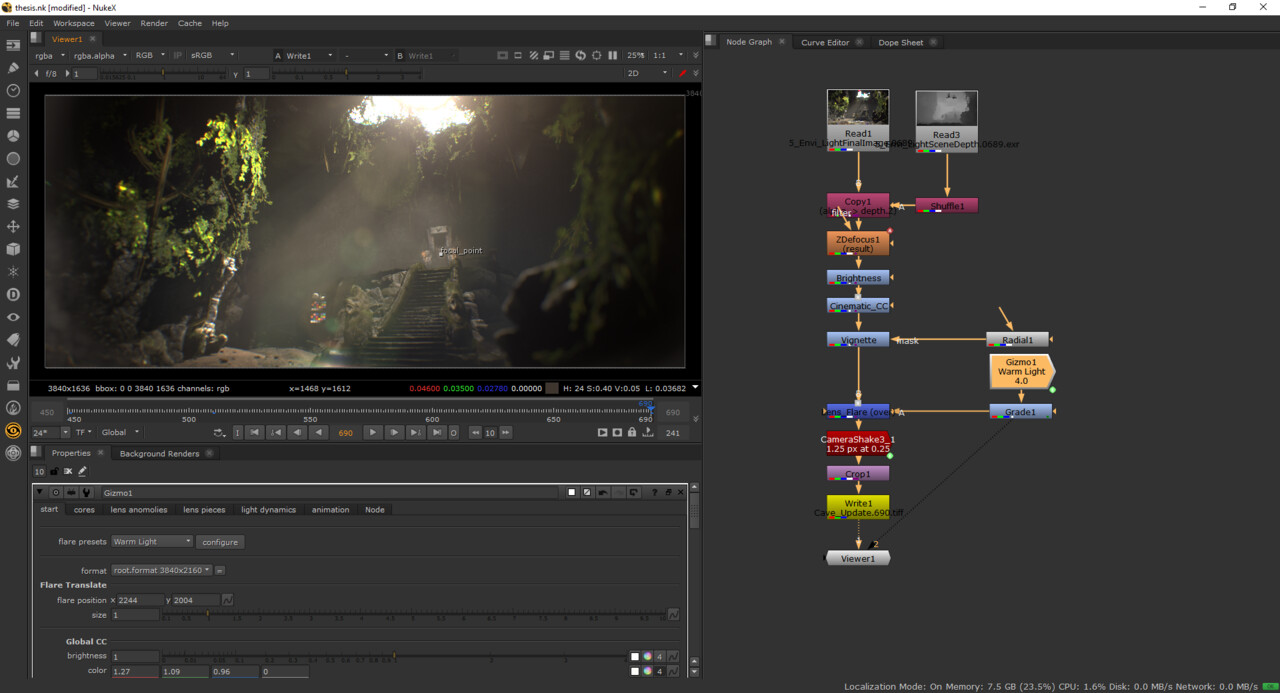
With all the required assets created, I can just render the sequence using the sequencer. I exported an .exr image sequence with a linear color space using a render pass format. The passes I use was Final Image (Beauty) and Scene Depth (Z). This allows me to get a more controlled camera lens blur using the Zdefocus node in Nuke. Additionally, I've also imported a lens flare gizmo downloaded from Nukepedia.
Additionally, I've also added a tiny camera shake into the scene. This camera shake node helps generate the handy cam feel, making it feel more like a natural environment. Last but not least, I've also added a vignette and crop it to 2.35:1 or a cinema scope format.
Here's how it looks like right now:
I guess this is it for this week's update, I'll continue polishing the environment for the coming week. 'Till next time!
